Netsuite

Bezala is the easy to use, mobile first, fully integrated expense claim solution that your NetSuite deserves. We’ve been developing an expense claim processes for NetSuite for thousands of hours so that you don’t have to.

How does Bezala help companies that use NetSuite?

Here are the main benefits of using Bezala as your Expense Claim Solution for NetSuite:

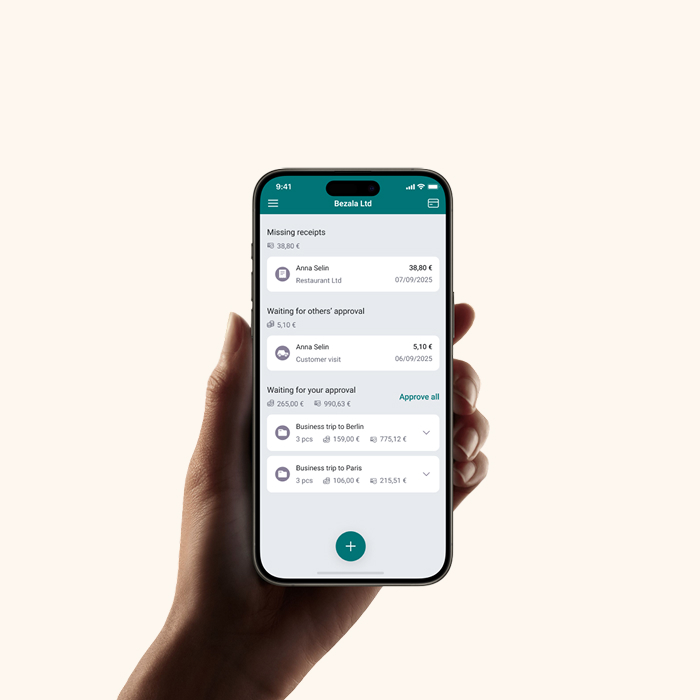
Your employees will be able to handle all of their Expense Claims through their mobile phone, meaning that you’ll get your expense claims in faster, and that you can close your books quicker!

You can automatically set dimension or project specific approval flows to the project manager. This way, you’ll have better controls, and the audit trail your auditors desire.

Bezala supports the local Expense Claim laws and regulations, so you can give your Employees the reimbursements they legally deserve.

Bezala can be fully customised to your needs, so you can make it the optimal Expense Claim Solution for your company.

How does Bezala help the accountants of companies using NetSuite?

The Bezala NetSuite integration has been developed in order to utilise as much of the great features that NetSuite comes with as possible. This way Accountants can use a familiar view, without having to manually enter anything to NetSuite!

  • Reimbursable Expense Claims are sent as Expense Claims to NetSuite
  • Credit Card Receipts are sent as Credit Card Receipts to NetSuite
  • With our two-way integration, you can be sure that your departments, projects, employees and accounts are synched to Bezala.

How does Bezala help the employees of companies that use NetSuite?

Your employees want to:

  • Know if they inserted their expenses correctly
  • Know when their expense will be reimbursed
  • Know how the process work’s

And we’ve solved this through communicating clearly.

In other words, we’ve focused on communication, communication and communication:

  • When the user creates a transaction, we’ll let them know if they forgot to fill in a field, or if everything was filled in correctly (real time validation).
  • When the expense is waiting for approval, we’ll let the user know who the approvers are.
  • When the expense is approved, we’ll let the user know when it will be sent to accounting and reimbursed.

Getting started

As we all know, setting up NetSuite integration often requires customisation. But don’t worry, we’ve already done most of the work for you, so that the setup cost will be slim to none. And we’ll gladly help setup the Expense Claim Solution you want, even if you want to have some flows customised. Contact sales@bezala.com to get started.

Once we agree to setup the NetSuite Bezala integration for you, here’s what we’ll do:

1. Add the necessary scripts to Netsuite

First off, we’ll add the necessary scripts to your NetSuite account. If you want to, we can even do this to your Sandbox, so that we can test it there first.


Once the scripts are added to NetSuite, we’ll need to setup your Bezala account. If you haven’t done this already, you can go ahead and setup a test account:


The following information then needs to be added to your Bezala account. We’ll have to do this part, but you can send your keys to us via SendSafely.

  • Host URI
  • GET script number
  • POST script number
  • Realm
  • Subsidiary
  • Token
  • Token Secret
  • Consumer Key
  • Consumer Secret
2. Select which NetSuite Accounts are to be shown in Bezala

In NetSuite, there are two types of Expense accounts:

The Expense Accounts listed in the General Ledger that are shown when adding Credit Card Receipts in NetSuite

The Expense Categories that are shown when creating Expenses in NetSuite

This is confusing to users, and hence we decided to combine these two in Bezala. Once the scripts are added to your NetSuite, you’ll see a few new fields when editing an account. Bezala imports only the accounts that have an Expense Category linked to them, AND that have the “SHOW IN BEZALA” checkbox activated.


This means that you have to have a corresponding Expense Category for each GL account that you want to show to your employees when they insert Expenses. When you’ve done this, navigate to the Accounts view in Bezala, and click the “Fetch form NetSuite” button. Then the accounts will appear in Bezala, and can be selected by your employees when inserting Expense Claims.

Allowing different Expense Claim forms

In Bezala, you can chose to show the following forms to your employees:

Receipts
Per Diems (Daily Allowance)
Mileage

In order to add these properly to Bezala, make sure that there is both a GL account and an Expense Category for them in NetSuite. Then when they are in Bezala, make sure to connect the accounts to the corresponding form from the company settings page in Bezala (requires the Beta user role: contact support@bezala.com to get it). Once the accounts are connected, you can go ahead and assign them to your admin user from the Accounts view in Bezala. Otherwise they will also be shown when your employees create Receipts.

Selecting which accounts are reimbursable

In the company settings view in Bezala you will find a “reimbursement account” dropdown (requires the Beta user role: contact support@bezala.com to get it). Select the payment method for which your employees expenses should be reimbursed. When an expense is added with that payment method, we’ll add it as an expense in NetSuite. Otherwise it will be added as as credit card transaction.

Adding Credit Cards

Select the Credit Card GL account that you wish to add to Bezala and activate the “Show in Bezala” checkbox. Pro tip: Go to Bezala and assign that Credit Card to only the employees who actually use it.

3. Selecting which Employees should be added to Bezala

First you need to navigate to the Employee list in Netsuite. From there, select edit on the employee you wish to add to Bezala.

Then you need to click enable the “Bezala user” checkbox. This Employee will then automatically be added to your Bezala account. Make sure that the Employees have their Bank details and Address Record (At least the country) set in their Employee Records, otherwise you won’t be able to reimburse them.

4. Selecting which Projects should be shown in Bezala

Navigate to the Project that you wish to show in Bezala, and activate the “Allow Expenses” checkbox from the edit view. Keep in mind that the Project has to exist in the Subsidiary which you are integrating to Bezala.


The Projects you have selected will be shown in Bezala under the “Cost Centers view”. The list of resources in the edit view will be added as the Assignees to the Projects in Bezala.

In that edit view, you will also find a new dropdown called “Project Approver”, and an existing one called “Project Reviewer”. If there are employees selected in these drop-downs, then all expenses that have this Project selected will have the following approval cycle:

Project Reviewer
THEN Project Approver

5. Selecting which Departments should be shown in Bezala

All of the Departments within the Subsidiary which is integrated to Bezala will be shown in Bezala.


Pro tip: you can assign these cost centers in Bezala to specific employees. That way all of your employees won’t see them.

6. Enjoy automatic Syncing

The following lists that meet the criteria explained above will be synchronised from NetSuite every day:

Employees

Departments

Projects

Accounts

7. Create Expense Claims

Now that the integration is setup, you can go ahead and create Expense Claims in Bezala.

8. Setting up a daily/weekly/mothly sync

Here are the syncing schedules you can choose between:

  • Daily: Expenses will be sent to accounting at 6am.
  • Weekly: Expenses will be sent to accounting on the day you select at 6am.
  • Last day of the month: Expenses for the last month will be sent on the first day of the month at 6am.

Or just click the “Send receipts now” link
All of your data will be moved to Netsuite when you click on the “Send receipts now” link in the main menu.

9. Browsing Expenses in NetSuite & Reimbursing Employees

Reimbursable Expense Claims are added to the Expense Claim view in NetSuite. There is a standard reminder on the home dashboard in NetSuite called “Expense Reports to Approve”. Click that to navigate to the Expense Reports. When you open a certain expense, you can see all of the necessary information, update what needs to be updated (ex: tax code) and approve it. When the Expense Report is approved it will follow the payment process you have setup in NetSuite.

Credit Card Receipts can be viewed in the Credit Card list view in NetSuite:

Browse attachments

We’ve noticed that many of our clients have limited storage space in NetSuite. To solve this problem, Bezala does not send any actual attachments to NetSuite, but we do send a link to the attachments. This way the Expense Claim images won’t clog your NetSuite, but you can still easily access your images at any time. NOTE: the people who need to access them images must be users in Bezala.

X. Want to add multiple Subsdiaries?

No problem, just repeat the steps above for each subsidiary. Your employees will automatically be able to switch between the ones that they exist in in NetSuite, and where they are selected as a “Bezala user”.

Recent news